
Yesterday I talked about the things that sparked the idea for Glory, a work that is currently on display at the Herbert C. Young Community Center in Cary, NC.
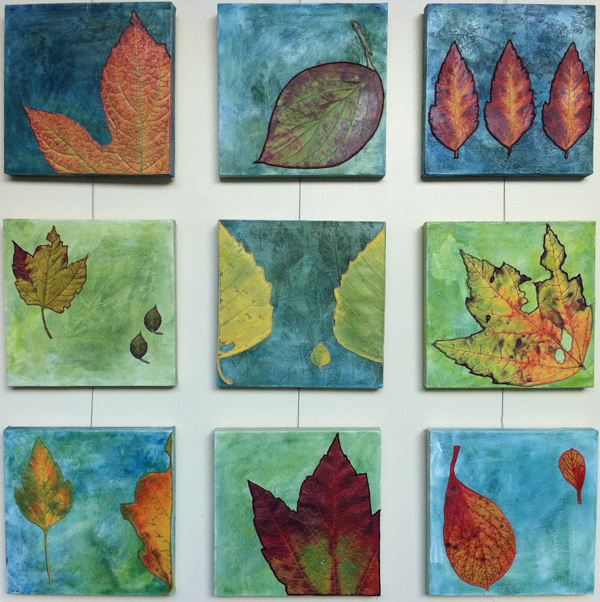
Sometimes it’s a visual stimulation that sparks an idea – like walking ankle deep through colorful leaves. Sometimes it’s a technique I want to play with – like digital printing on fabric. Sometimes its’ a deadline – most often – it’s a deadline. This time it was the convergence of all three.
 Step one – pick up a handful of irresistibly glorious fall leaves every morning. Scan them at a very high resolution (600dpi).
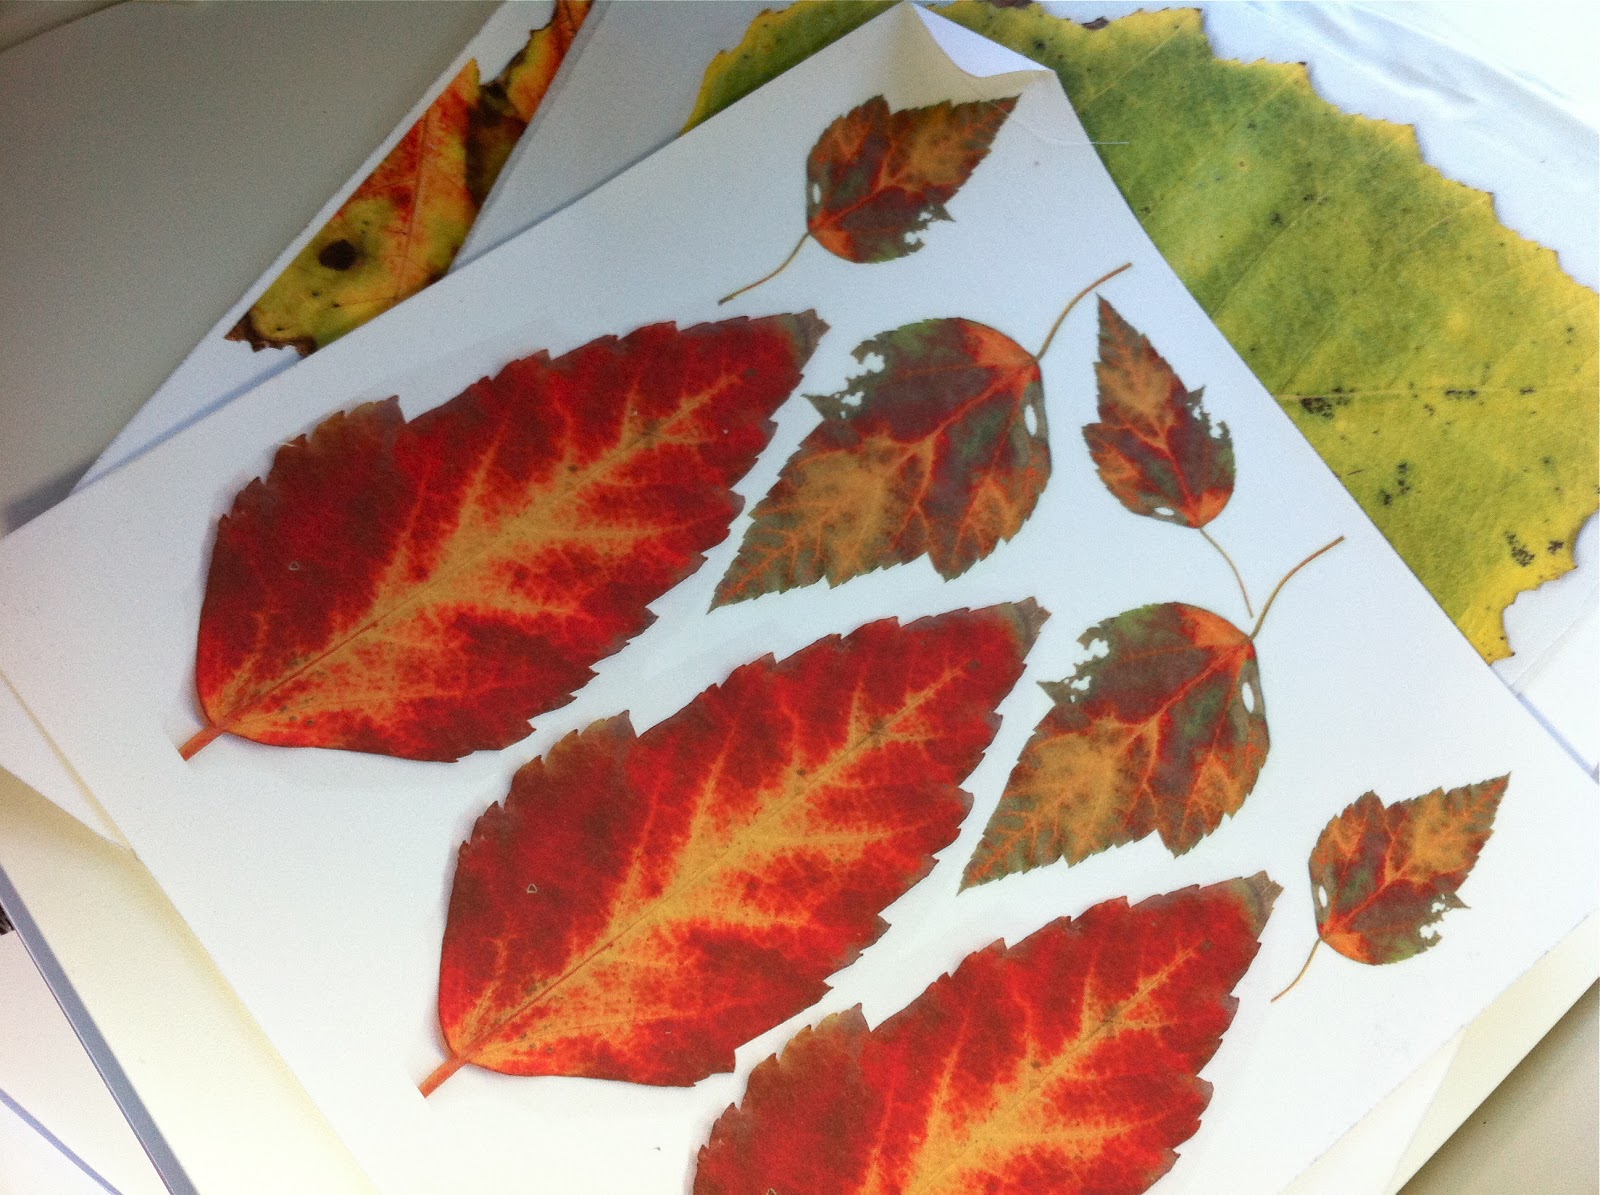
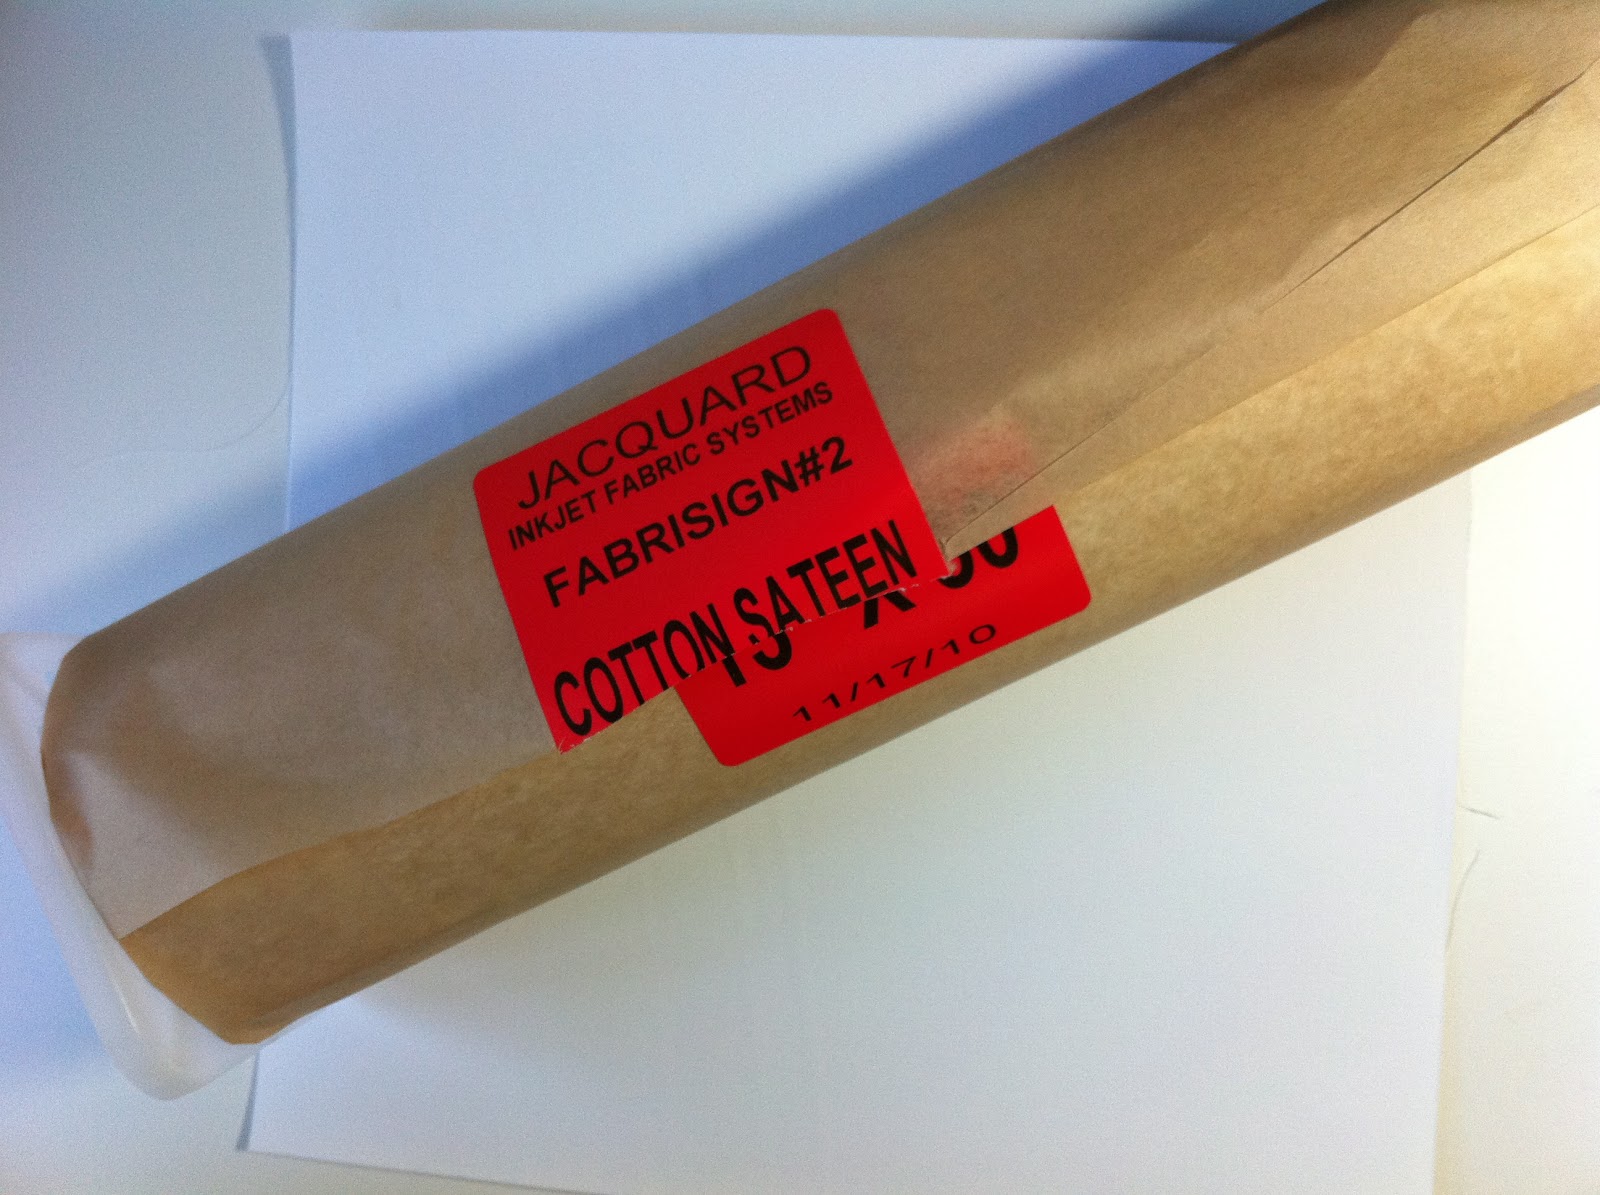
Step two – Cut my Fabrisign2 Cotton Sateen into the sized sheets I want. Realize that while 13″ leaves are amazingly cool – the canvases I’ve prepared for them are only 12″.
Step 3 – Play around in photoshop and smoosh in as many colorful leaves per piece of fabric as I can. Print out tests of each printer setting to figure out how to get the best color on the fabric. Print leaves. Go OOOH!

Step 4- Fuse leaves to timtex – or whatever super heavy stabilizer I happen to have on hand.
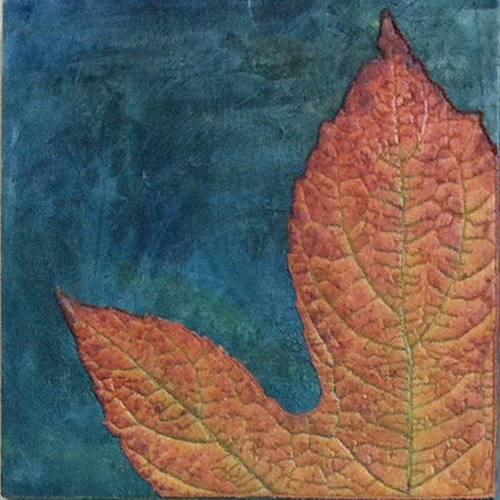
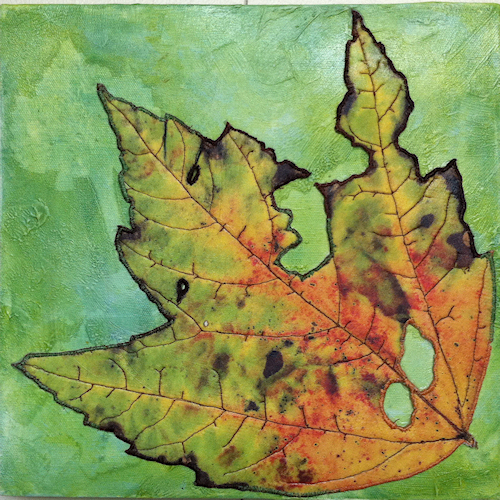
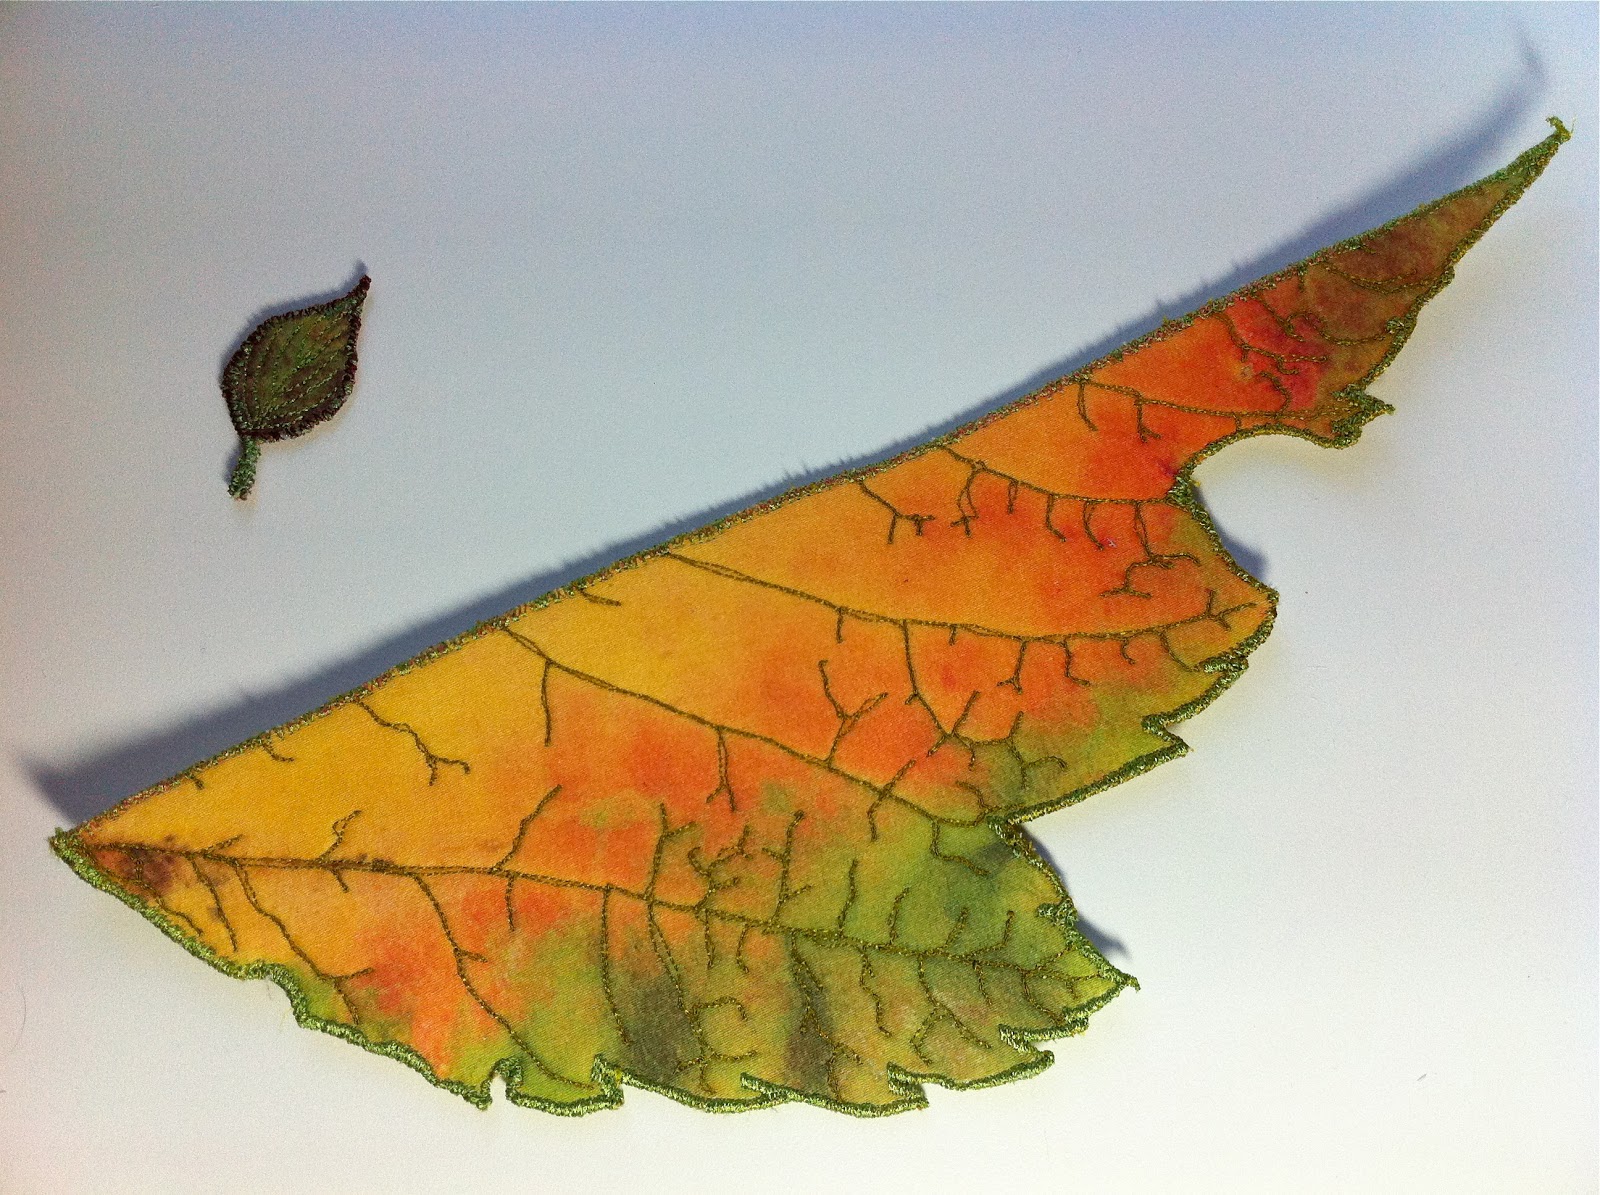 Step 5- Free motion quilt the veins of each leaf. Straight stitch around the edge, cut it out, then free motion zig-zag around the edges.
Step 6- 10 year old computerized machine finally fries the board. Go on Ebay and buy a Bernina 930 in frustration. I’ve wanted one for years anyway right? No computer. Workhorse! I’ll be passing it on my my kids. Give up sewing for the night.
Step 7- Borrow a friend’s machine, finish the edges. Use matt gel medium to glue each leaf to the painted canvas. Paint over the whole thing with gloss gel medium. I think I like the shine and it gives the leaves a bit more richness and depth but the stitching is still a wonderful element.
Which one is your favorite?


15 Comments
Lyric Art — glory
November 25, 2013 at 9:32 am[…] The story of GLORY’s creation can be found here. […]
Lyric Art — Picture It Framed Tutorial: mounting small textile art on gallery wrapped canvas
November 19, 2013 at 4:54 pm[…] this link to see how this series was created. In this case the leaves were simply glued onto the canvases […]
Work on the Wall: Chambers Arts Gallery | Lyric Art
March 8, 2013 at 8:28 pm[…] And…. (drum roll please!) One of my pieces has sold from the show! Glory – the nine green canvases with the leaves will be going home with a new owner. You can read more about the creation of that piece here. […]
Joanna Price
February 11, 2011 at 10:15 pmExquisite! I really like the first one — the leaf looks like leather! But I LOVE the "decay" one for its wabi sabi nature and its gorgeous colors.
lyric
December 20, 2010 at 1:17 amIf you can make it, dome on the 11th at 10:30 am for a gallery walk with me – then a potluck lunch at my place!
Jeanne Turner McBrayer
December 19, 2010 at 10:53 pmThey are all so pretty. I like the backgrounds as much as the leaves. Might have to drive out to Cary to visit them!
Jane
December 10, 2010 at 2:13 pmOHMYGOD are these ever GORGEOUS!!! I love the stitching and gel medium together, and the composition is fabulous. Thanks for sharing!
Jane
Barbara Harms
December 8, 2010 at 10:02 pmWhat an amazing idea, it is beautiful. Thanks for sharing your process. I'm inspired!
Tracie Lyn Huskamp
December 8, 2010 at 9:26 pmWHOOAAAA… Lyric… I LOVE THIS IDEA… Ok.. I going to go dig in my box of press leave RIGHT NOW. Thanks for the inspiration!
colorific
December 6, 2010 at 10:24 pmYum. Yum. Yummy Yum! Yum!!
lyric
December 5, 2010 at 1:26 amJudy – I had a Bernina 180 that I was using – that died.
I drop the feed dogs, use a free motion foot, and set the stitch width to whatever I prefer. Then I can go backwards or forward at whatever speed I wish to cover the edges. There are places that I change the thread color and go back over the stitching of another color to blend them a bit.
The "new" Bernina 980 looks a bit beat up and well used – but it hums along like a good old work horse. No computerized parts. The thing weighs about a ton. I'm happy. Still haven't heard back yet about whether or not the 180 is reparable.
Judy Warner
December 5, 2010 at 12:44 amHi Lyric
I am curious if you did the freemotion zig-zag around the edges of the leaves with a Bernina? And, about what settings you used.
Love the color of your leaves! Thanks for all the detail on your method.
Judy
Corliss
December 4, 2010 at 6:23 pmWay cool! Thanks for sharing this technique which inspires me to give it a try. Sometimes wish my board would fry so I could go for a Bernina. You will have to let us know your experience with it.
Linda M
December 4, 2010 at 3:57 pmI also love the last one, but the others are pretty spectacular also.
Sue Bleiweiss
December 4, 2010 at 3:12 pmThe textures on these are fantastic. Love that last one – gorgeous.
Notice: Undefined variable: consent in /home/lyricki/public_html/wp-content/themes/hawthorn/comments.php on line 49