

Quite some time ago (isn’t it funny how quickly tech gadgets are outdated!?) I sent in these little cases for Quilting Arts Magazine for the “Glam-To-Go for Gadgets” article. They didn’t use the case I actually spent the most time making – no worries. It’s perfect for showing you one of my favorite techniques to play with – beaded fringes!

Materials:
- Something to add fringe to: gadget case, scarf, your husbands favorite necktie. In any case it will need to have enough “oomph” to support the fringe. In this instance, the fringe will be supported by the satin stitched bottom edge of the case. For a scarf I like to add a tiny bit of cording or seam tape or ribbon (depending on the weight of the scarf) inside of a rolled hem.
- Beading thread (I love Nymo) and a beading needle (or a size 11 applique needle.)
- Seed beads and other larger beads. Make sure the holes in the larger beads are not so big that the seed beads sink into them. If they are you’ll need to put medium beads next to the large holed beads.
1 – Make your knot. Thread your needle, bring it in through the case and out on the edge of the satin stitching. Leave the tail of the thread hanging out. Wrap the thread (not the tail end) three times around the tip of the needle, hold the wrap with your thumb and pull the needle through. You should have a secure knot now. I often make at least one more knot in close to the same place just to be extra secure.
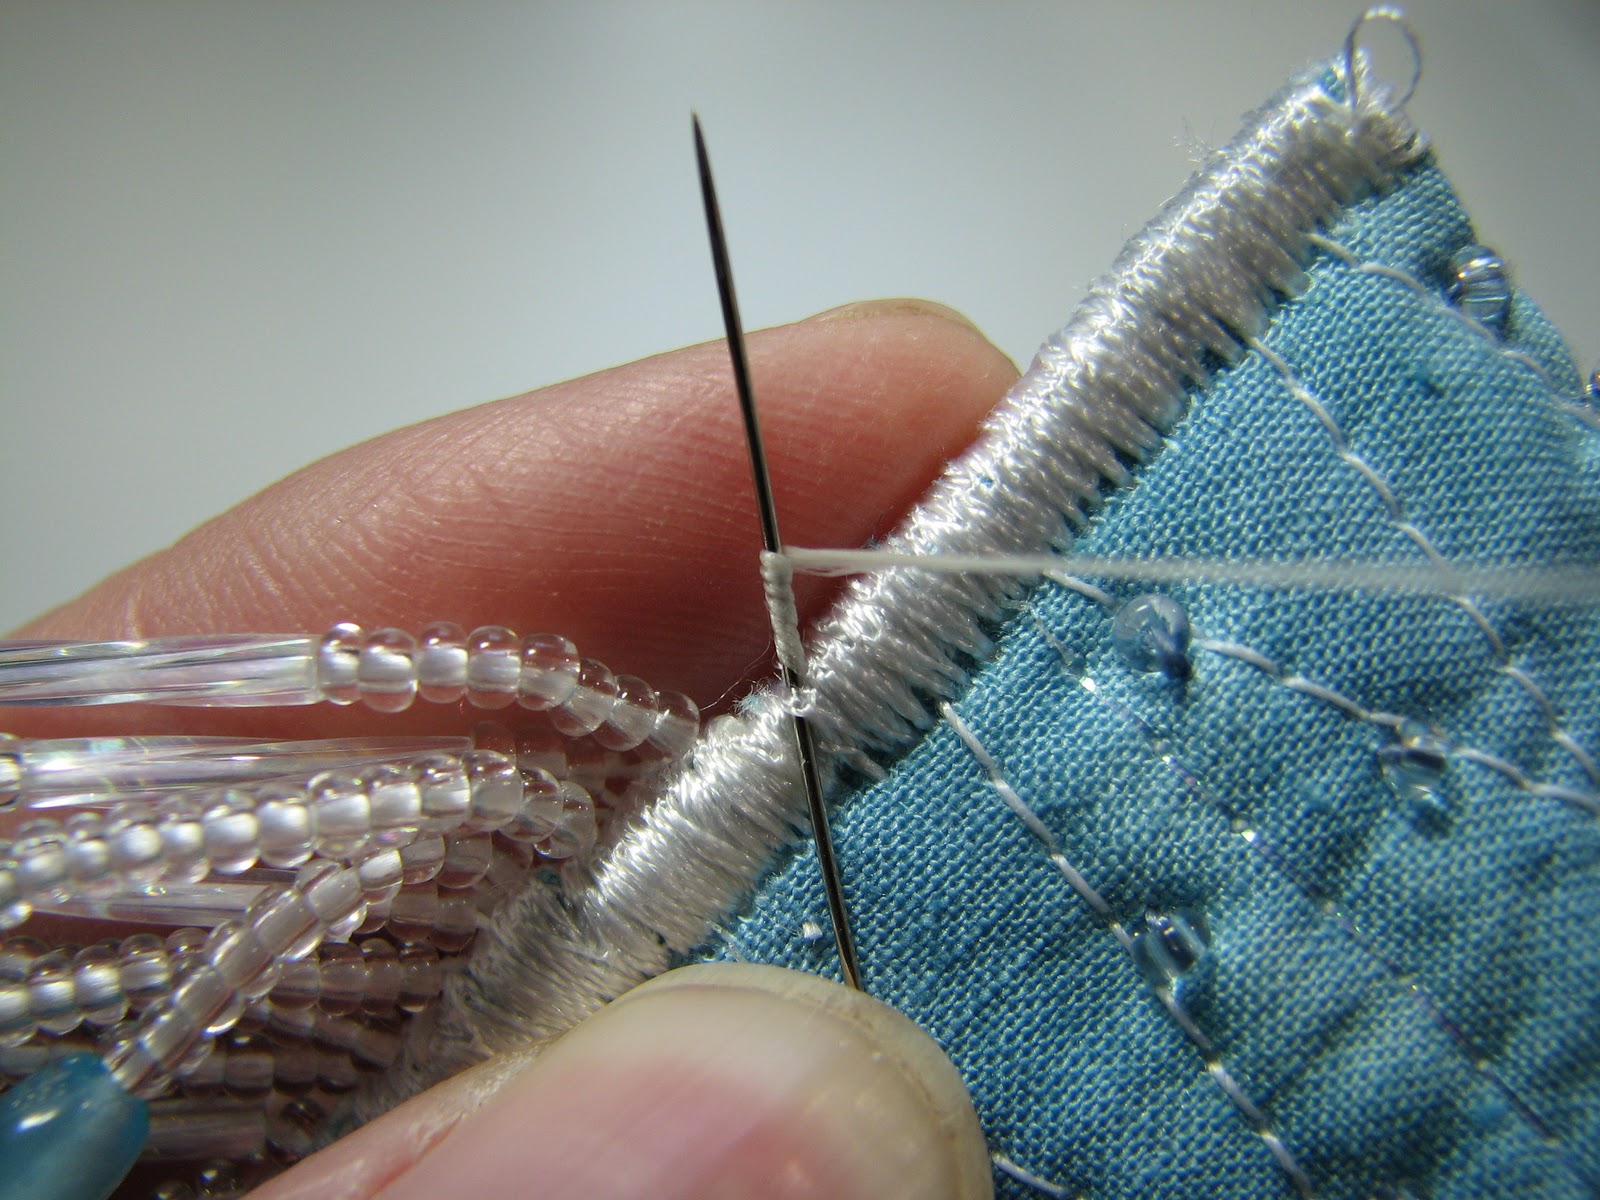
2 – Load your beads onto the needle. Add seed beads until your fringe is about as long as you wish it to be then add your bigger bead and one more seed bead. The seed bead on the end is your anchor. Slide all of the beads to the end of the thread.
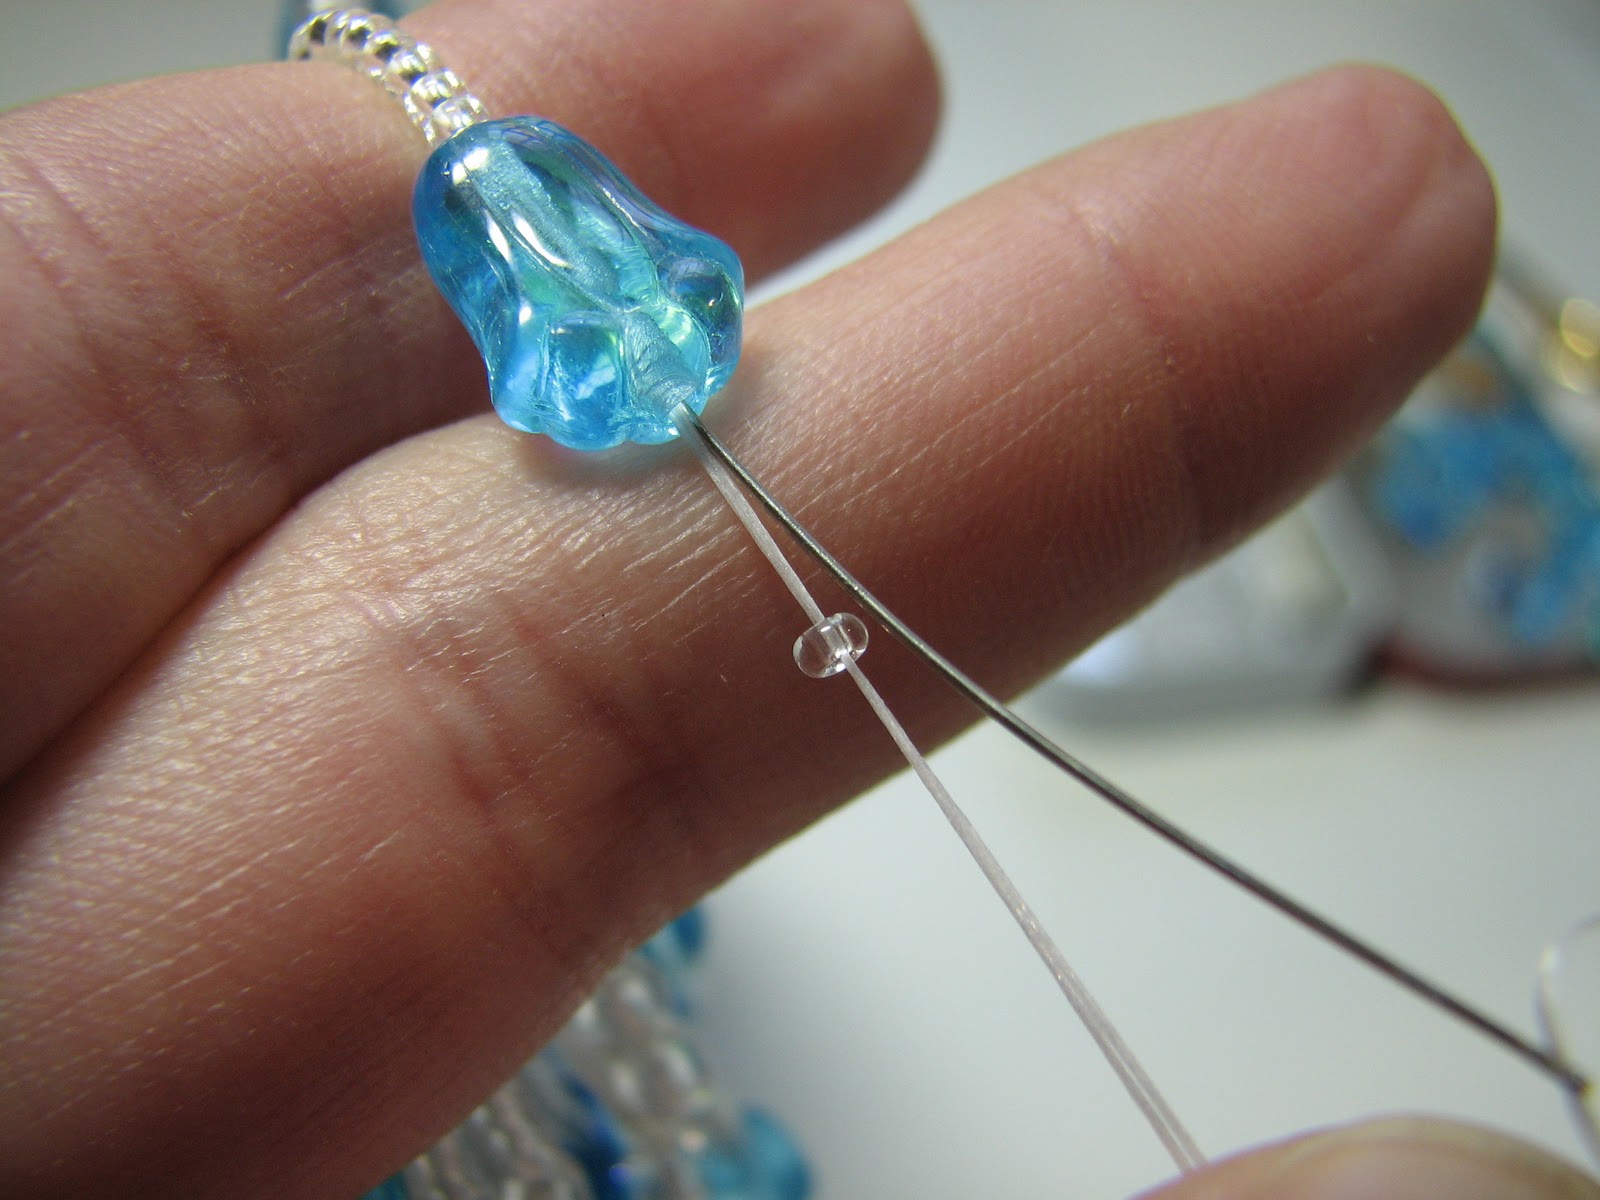
3 – Anchor your fringe. This is the only tricky part – and it really isn’t hard. Slide that last seed bead away from the line of beads then send your needle right back through your whole line of beads. I find it easiest to do if I bend the line of beads over my finger, holding the thread taut. This lines up the beads in a row and holds the thread tight along the bottom of each hole. That way you have room to get the needle back up through the whole line.

4 – You might not be able to get the needle all the way through your line of beads in one shot. No worries. Just do it a bit at a time, holding that thread taught to it easier to slide the needle through.
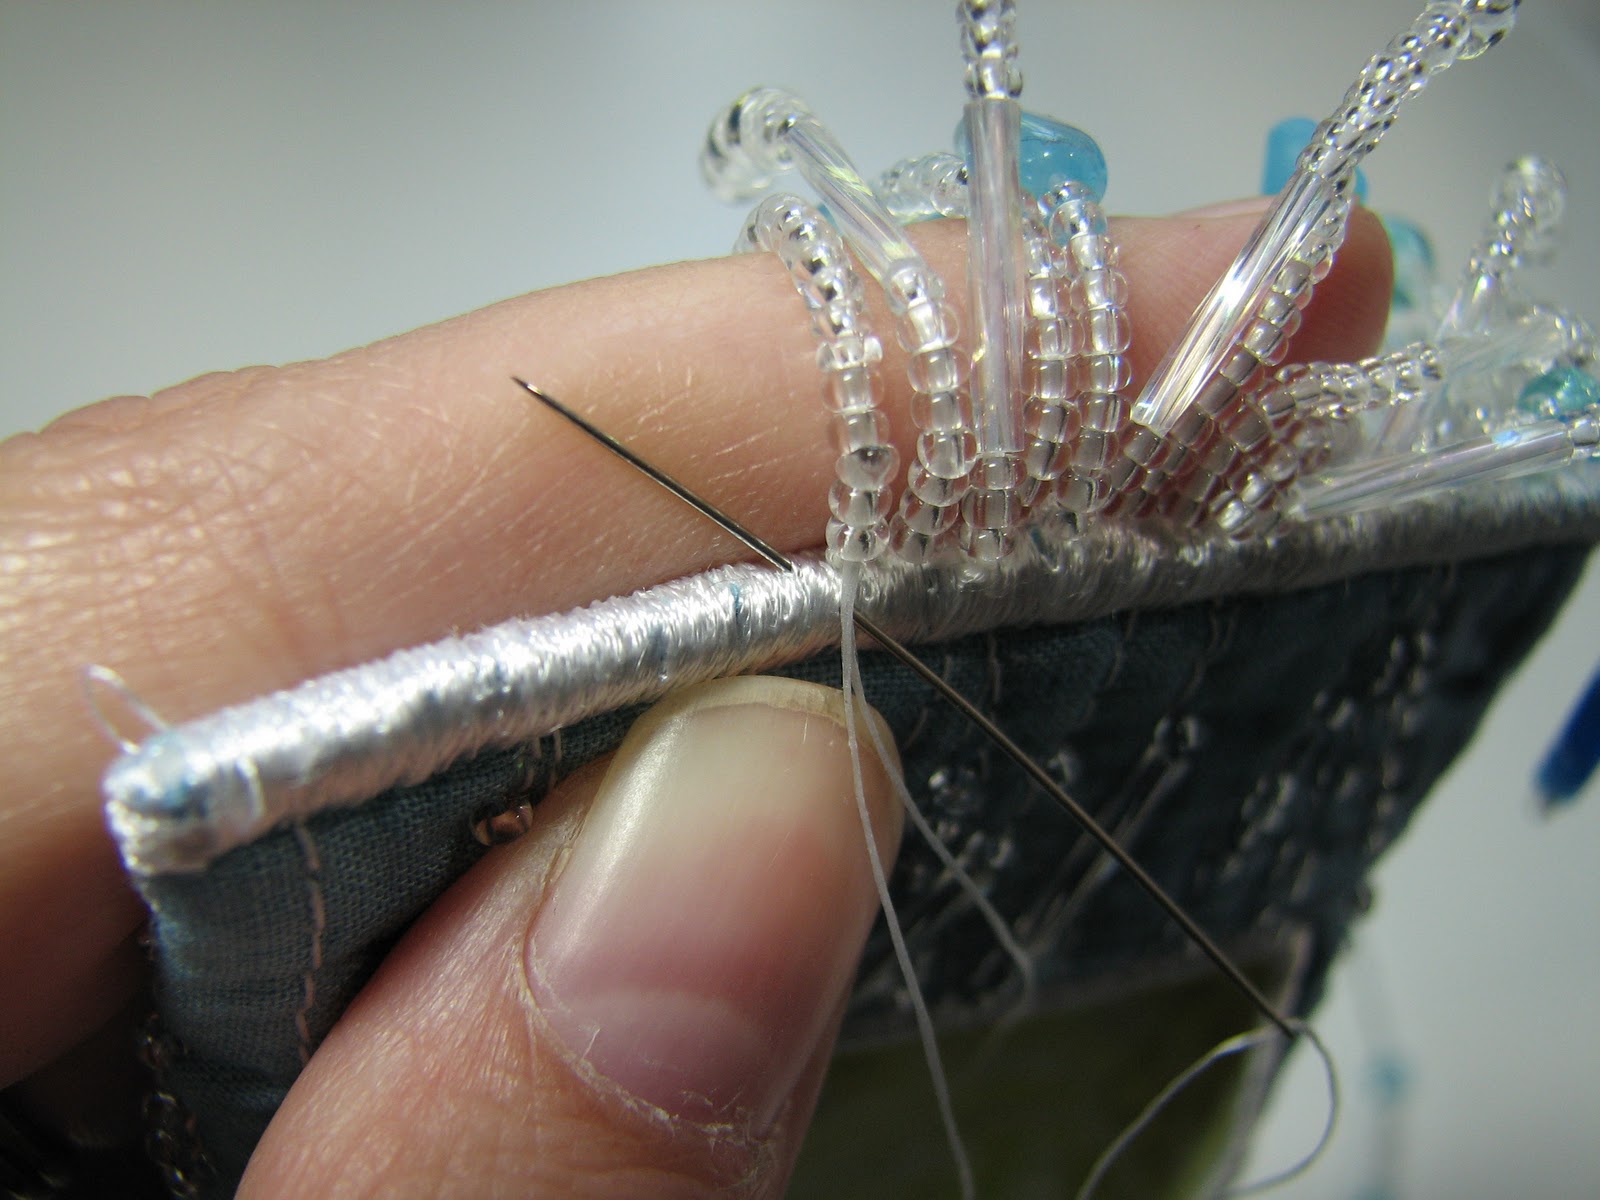
5 – Push your needle into the satin stitching, right under your fringe and come out where you want the next fringe to start. Continue adding fringe until you think you’re done. Notice here that my fringe isn’t the same – I like it funky. Sometimes my big bead is in the middle, sometimes there are more seed beads on the end than just one anchor. Mix it up and make it fun. (And yes, I am an artist and my cuticles and nails ALWAYS look that bad!)

6 – Make a knot right next to the last fringe in the same way you did at the beginning. In fact, make two knots. Come to think of it, make a knot and just keep going (not starting with a new thread each time) every three or four fringes just to be safe. I truly dislike the sound of a million tiny beads scattering across the floor as my child yanks on my fringes. At the end, after your last knot, send your needle up through the satin stitching and come out anywhere. Trim the tail off and you’re done.
Hope you enjoyed it! Go add some beady fringe to something! They make wonderful swishing noises as they move and swing around.
I’ve been hard at work putting together a new course for my fellow bead-a-holics.
OPEN NOW
EXPAND YOUR CREATIVITY as Lyric Kinard takes you beyond the basics of bead embroidery. Build on what you learned in Bead It Like You Mean It pt. 1 and learn new dimensional beading techniques that jump right off the surface. Wrap cords or walk a line of seeds over a bugle bead bridge. Try out a beautiful Gourd stitch to attach a cabochon or go right over the edge as you add beaded borders to your cloth. Loop your stacks or turn them into crazy twisted or banged fringes.


12 Comments
Casual Blog
August 14, 2016 at 7:53 pmAdd Some Funky Fringe
[…] ding thread (I love Nymo) and a beading needle (or a size 11 applique needle.) […]
donnarae
September 28, 2011 at 2:33 amgreat tutorial with excellent photos — made me want to go sew some fringe on a crazy quilt
Rachel@oneprettything.com
October 18, 2010 at 2:49 amclicked over from Craft Gossip and would love to shares this with my readers if you didn't mind.
Nancilyn (Fiberdabbler)
October 15, 2010 at 4:09 pmThank you for the tutorial which I linked to via Jane's blog. It gave me the just the brainstorm I needed to finish up a gift piece that's been hanging around for a year. The problem was lack of support for the fringe. Now I know exactly what to do.
Gloria
October 15, 2010 at 2:39 pmThank you! I have a project sitting for some time now…needed something. Beaded fringe will give it the finishing touch it has been waiting for all these months.
Rosali
October 15, 2010 at 1:06 pmGracias por compartir, saludos desde México.
geni
October 14, 2010 at 6:33 pmThank you for this great tutorial!
Ruth Anne Olson
October 14, 2010 at 6:27 pmThank you for this. Very useful information, as always.
norma
October 14, 2010 at 5:38 pmGreat tutorial! Thank you!
sophie
October 14, 2010 at 5:28 pmI still have one of those outdated iPods and I think a case like yours would be lovely to make for it. Like my iPod, it has a nostalgic antique quality.
Thanks for the great tut.
judy coates perez
October 14, 2010 at 4:30 pmgreat tutorial Lyric!
Alma Stoller
October 14, 2010 at 2:26 pmvery nice. thanks for sharing Lyric,
Alma
Notice: Undefined variable: consent in /home/lyricki/public_html/wp-content/themes/hawthorn/comments.php on line 49