

The small embroideries I’ve made for my solo show, Sone, Water, Time, are lovely little pieces of art. But most of the general public doesn’t have a lot of experience with textiles as fine art so they might just think, “we’ll thats a fancy potholder” when they see them.

Step 1. Use light molding paste to screen print images on your canvas, include the sides of the canvas. Don’t worry about the center as it will b covered.
I love to present small works like these in a way that every viewer can immediately understand as “Art.” Sometimes that means framing. For these pieces I’ve chosen to mount them on 2” deep gallery wrapped canvases. It beings the work itself to the front, rather than being protected and surrounded by a frame.

Step 2. Add watered down paint to the canvas after the printed molding paste is completely dry.
I also like to make the canvas into an integral part of the artwork. In this case I’ve used thermofax screens with mill wheels and printed those images with light molding paste onto the canvases. It’s almost invisible until you start adding in some paint. I’m going for a very subtle textural background that will support rather than compete with the embroideries.
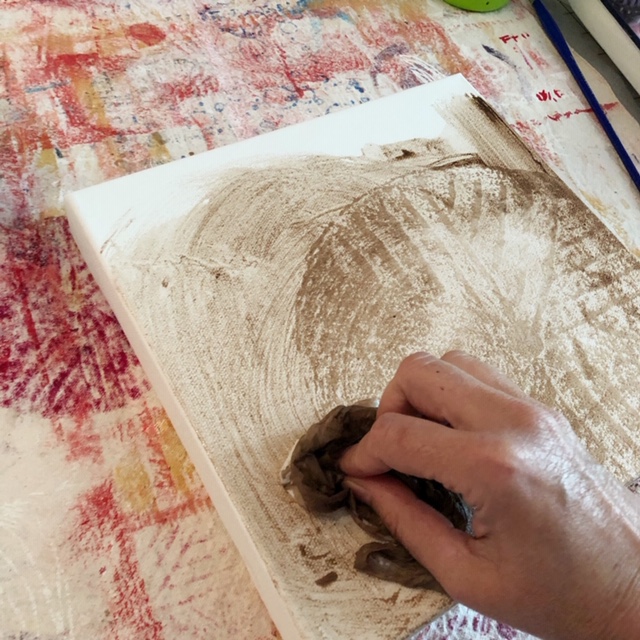
Step 3. Use a damp cloth or paper towel to wipe away some of the paint.
You can make these background textures as strong or as subtle as you’d like. I love layers of subtle texture that allows the viewer to discover more and more visual interest as they spend time with the work.
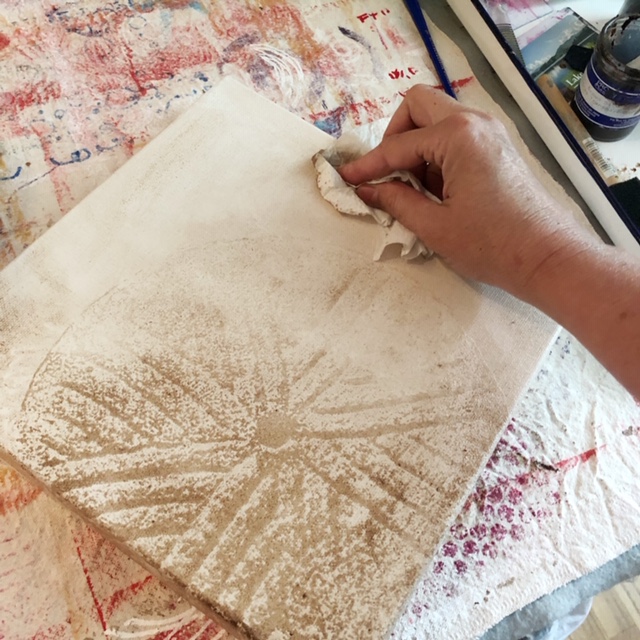
Step 4. Blog on or off any extra paint. Dampen or dry your cloth according to your desired effect. Make sure to include all four sides of the canvas.
You will find that the paint sinks into the more absorbent molding paste images. My daughter walked in at this point and said, “it looks like you rubbed dirt into them,” which was exactly what I was going for.

Step 5. If desired, brush on a layer of transparent white paint to make the imagery even more subtle.
In the nest post I will show you how to mount the textiles onto the canvases.
Please mark your calendars and join me for the opening reception of Stone, Water, Time at the Cary Art Center. July 26th, 6-8pm.


1 Comment
Glorianne
July 8, 2019 at 5:17 pmThank you! This is fabulous!