

 The process of moving the ink from a photocopy onto fabric with Citra-Solv is my favorite instant gratification technique in fiber arts. You can find a tutorial on the process here. Sometimes you might have a really wonderful image that isn’t quite ideal for the process; either not enough contrast or too much dark ink in the background. Today I’ll show you how to punch up the contrast in a photo to help the transfer to come out better.
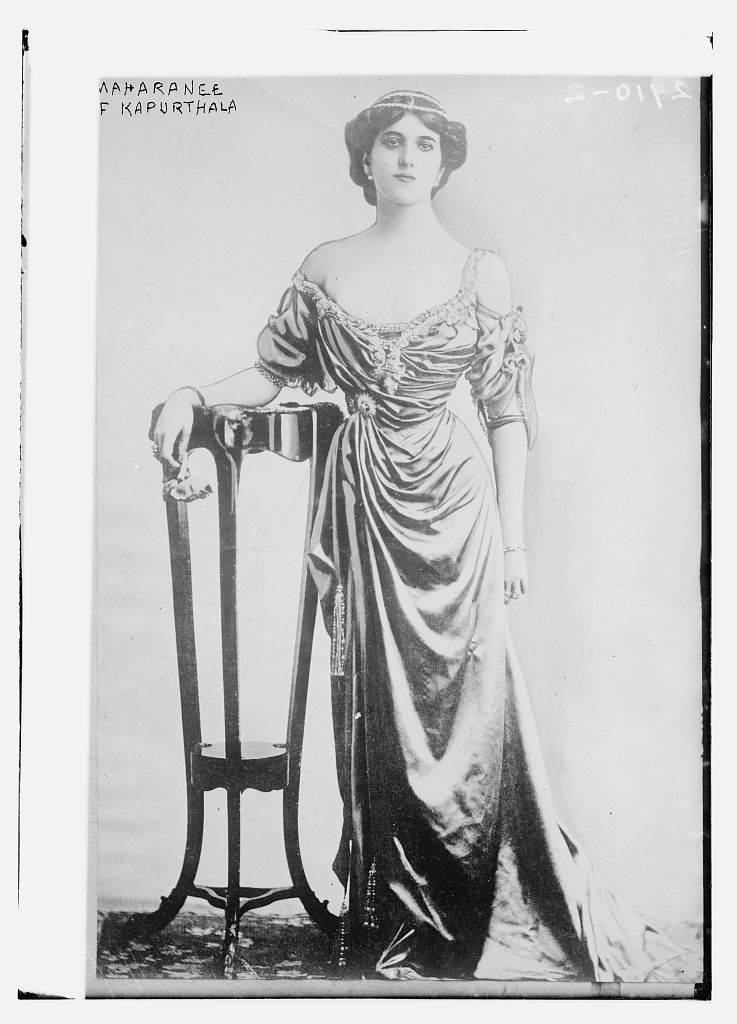
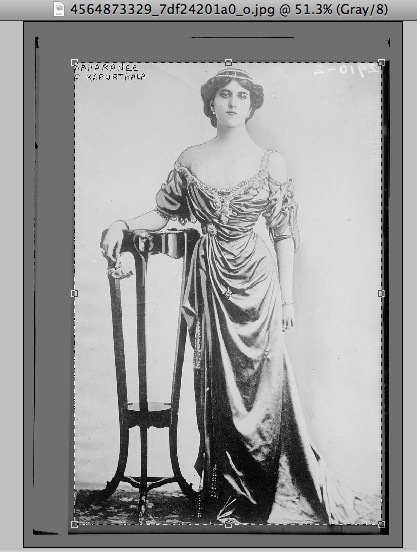
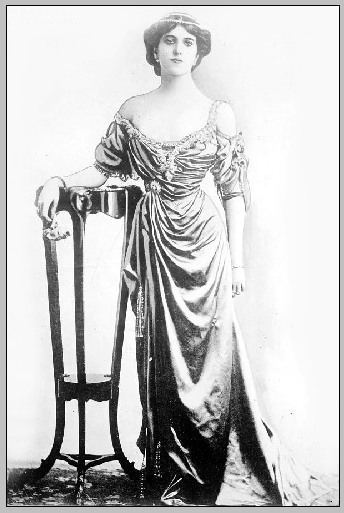
In the tutorial I posted about choosing an image Miss Maharanee of Kapurthala came out as the best photo because of the plain background that didn’t compete with the main image. She does have enough contrast and there isn’t too much dark ink. Still – there are some things that you can do to make the image even better.
 I’ll be using Adobe Photoshop Elements 4.0 for the tutorials this week. It’s an inexpensive program and only a couple of years after I bought it, it’s up to version 8.0. It does everything that most digital editing hobbyists will need.
I also use Corel’s Paint Shop Pro on our family desktop. It’s much more powerful but quite a bit less expensive than the full blown version of photoshop. But then – I’m a digital editing junkie.
Don’t despair if you aren’t using the exact same program I’m using here. Most any inexpensive digital editing program can do what I’ll show you today. Just click on help in the upper bar of whatever program you are using and search the function that you need and the program should tell you where it is.
 Now – I could use Miss Maharanee just as she is – I like the vintage photo look. But I think I’ll isolate her and make her features a bit more clear.
Step 1 – CROP
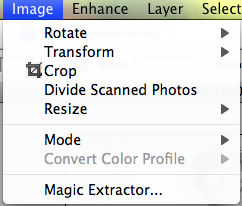
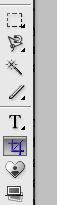
If I want to isolate Miss Maharanee I might as well get rid of all the extra pixels to begin with. Find your Crop tool – it usually looks something like this. You can also find it under Image on the upper menu bar.
Look to make sure that the Aspect Ratio says No Restriction, for Free Form. Otherwise the crop tool will only let you crop to a standard print size.
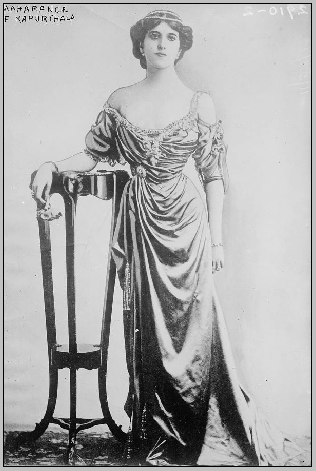
 Click and drag the box as close to your image as you can without cutting off any parts you want to keep. The part that will be cropped will be grayed out. If you need to move it a bit grab one of the little boxes on the edge of the dotted line with your cursor and drag the box wherever you need it to be. Double click to select and crop the image.
 Now, if you accidentally cropped something you wanted to keep don’t panic. Your best friend in digital editing are these two little arrows. This are the UNDO and REDO buttons and I use them ALL the time! With these two little buttons at your disposal you don’t need to fear messing anything up. Just click the little back arrow and it will take you back one step. You can click it as many times as you’d like to get to where you want to be. If you want to try something out and compare steps you can click back and forth as many times as you’d like to. You can also find the Undo button under Edit on the menu bar. The key command Control Z does the same thing. (Command Z on my mac.)
Step 2 – SAVE

 Don’t forget the most important part – saving your work. My program has the unsettling tendency to quit on my every once in a while right in the middle of a project. If I haven’t saved along the way I have to start over. You should save your work every few changes.
 Under File, click Save As. NOT, I repeat NOT, Save. You want to keep your original as is. If you simply click Save you over wright your original file. Not good. Yes, of course you can always click undo until you get back to the beginning and save your work then, but this is less of a pain. Change the name, choose where to save your file, format it as a jpg and click Save. Alternatively, you could leave the name the same and click the As a Copy box if you’d like.
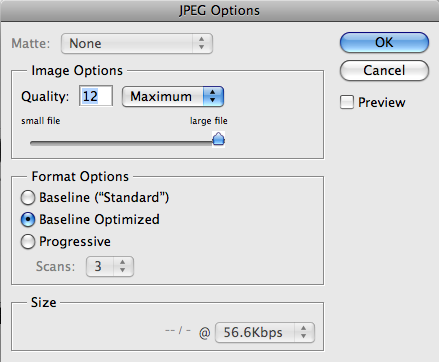
Now you’ll see a box like this. This is important. Slide the Quality button all the way up to the right. If you don’t the file will be compressed waaaay too much and your image will be all pixelated. (Ask me how I know.)
As I work I try to remember to Save a Copy, or Save As with a different name after every main change. That way I can go back to some place I liked and start from there – AND I don’t lose my original.
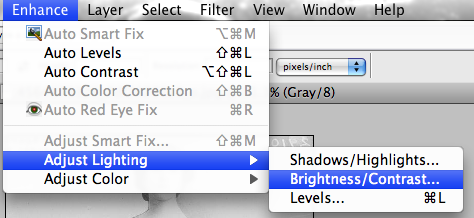
Step 3 – BRIGHTNESS/CONTRAST
Under the menu bar click Enhance, Adjust Lighting, Brightness/Contrast. Make sure the Preview box is clicked on so that you can see what happens as you move the slider back and forth.
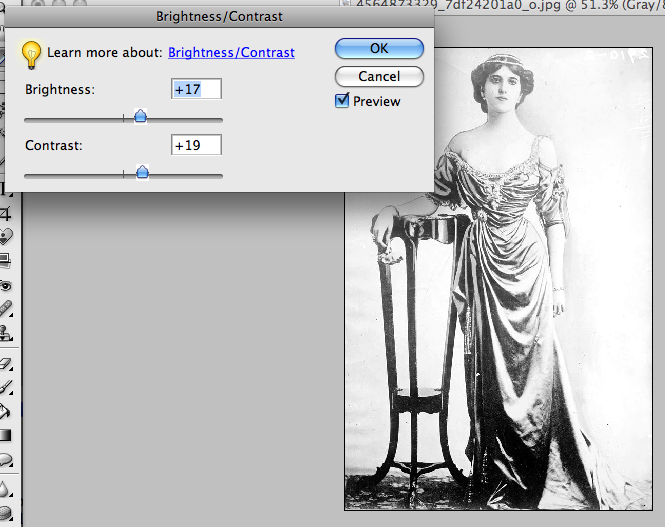 Play with both of the adjustments until you find something pleasing to you.
 Here I’ve boosted the contrast up to about +17. Anything above that and I loose the edge definition on her shoulders. The contrast is boosted to about +19. If I go much above that in this particular photograph I loose some of the definition in her dress.
There isn’t anything magic about these numbers and every photo is different so you really do just need to play with the numbers until you find something you are happy with. Remember that you can always click the undo button if you don’t like what you just did. Repeat step 2 – Save.
Step 4 – ERASE
 Miss Maharanee is looking pretty good now, but I’d still like to get rid of some of the extraneous stuff around the edges of the photo. There are still smudges and markings that will show up when you make a transfer. I’d rather not have hard straight lines on the outside of my image.
 Find the Eraser icon on the tool bar and click it. I want to blur things out gently so I’m going to set the Opacity at about %60. Click on Size in the Eraser Toolbar and move the slider up and down. You’ll see a circle on your image that expands or contracts. That’s the size of your eraser. I’ve also chosen a Brush (that’s the squiggle next to Size) with fuzzy edges so that I don’t get any hard lines from my eraser. Now just brush over the edges, clicking often with your mouse to reset. If you brush for a very long time without reseting you might make a mistake. Then when you undo you have to do the whole thing over. Erase things in short bits and then you only have a little bit to do over.
If you need to get in close to an area, such as the small space above her head you can use the Zoom tool to make the picture look bigger or smaller on your screen. (On my mac’s sensor pad I use two fingers to scroll up or down to zoom in or out.)
I’ve brushed over all of the edges, and the label that was written in the upper left corner so that now Miss Maharanee is unencumbered by edges of any sort. There is still a little ink around her, softening the image for something of a background fade. What do you think?
Repeat step 2 – Save. Tomorrow I’ll continue the tutorial with instructions for selecting and deleting backgrounds entirely, or for boosting the contrast in only certain areas.


5 Comments
Wen Redmond
June 30, 2010 at 3:50 pmGreat Tute! Your instructions are clear and concise. Thanks, looking forward to more!!
Alma
June 30, 2010 at 2:36 pmLyric,
This is great.
Thank you.
Alma
Carole
June 29, 2010 at 9:01 pmLyric… I am so in need of something like this! Thank you tons!!!
Marti
June 29, 2010 at 8:29 pmLyric,
I have been wanting to dive into editing photos – do not have photoshop yet – but your tutorial just might have pushed me over the edge. Thank you so much. I read and will reread your tutorial carefully. This opens up everything!
Ruth Anne Olson
June 29, 2010 at 12:56 pmTHANK YOU!
Notice: Undefined variable: consent in /home/lyricki/public_html/wp-content/themes/hawthorn/comments.php on line 49