
If you missed part 1 of this tutorial you can find it here or scroll to the previous post. I’m mounting these small embroideries to give them more presence. Many viewers might not have had any experience with textiles in a fine art setting can immediately appreciate them as works of ART when they see them framed or mounted like a painting. Also – I just really like them this way.
Now that my canvas is painted in a way that will enhance and support my textile art, I’m ready to mount the works. I chose to wire the backs before mounting the embroideries as that process is a little rougher and I wanted to be gentle with the artwork.

Step 1. Use a card to measure and mark the wood approximately 1/3 down the inside of the frame.

Step 2. Drill a starter hole for your eye screws at the mark.

Step 3. Twist in eye screws. I use a small screw driver poked into the eye to twist it all the way in. I measured out my wires and used jewelry pliers to wind the wire snugly in. I’ll tape those twists later just to make sure nobody cuts themselves on the ends of those sharp wires.

Step 4. I used paper to make a template the size of the canvas, centering the artwork. Mark where the sides and corners of the artwork will be.

Step 5. Brush a light layer of gel medium inside your markings then gently lay your textile work onto it. Make sure it is centered then smooth it down. Use a small brush to apply medium to the underside of the corners and edges.
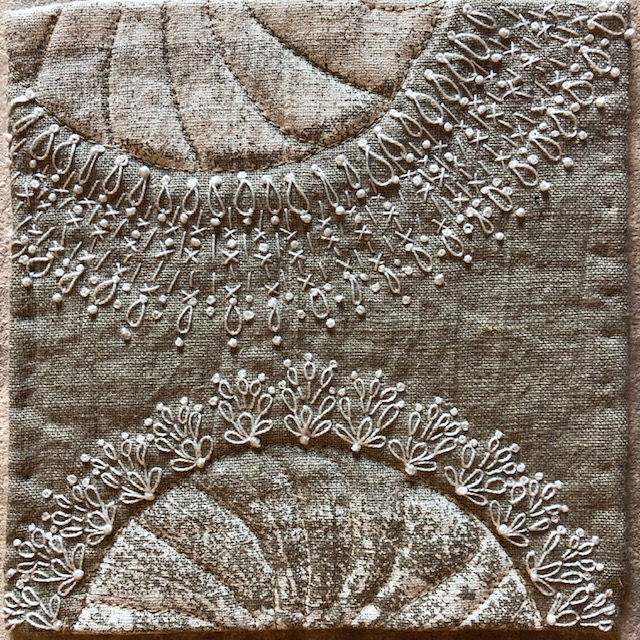
This works fine for these pieces because they have a layer of wool felt that keeps the medium from bleeding through to the top layer of cloth. If I only have one layer of cloth I would sew the work directly to the canvas.

Step 6. Lay something flat and heavy on top e canvas while it dries. In this case I laid two canvases face to face then weighted the frames with wood to press the embroideries without smashing them while the medium cured.

Hope youve enjoyed watching his process. My online course, Picture it Framed, offers a whole boatload of video lessons with other options for mounting and framing textile work.
Learn more about Picture it Framed here.


2 Comments
Patti Maxwell
August 4, 2019 at 8:54 pmIt’s fascinating to watch the process. I will appreciate them even more when I see them at the art show.
Stephanie
July 19, 2019 at 5:34 amThanks for these two tutorials Lyric. I found them very helpful and I appreciate your generosity.
Notice: Undefined variable: consent in /home/lyricki/public_html/wp-content/themes/hawthorn/comments.php on line 49